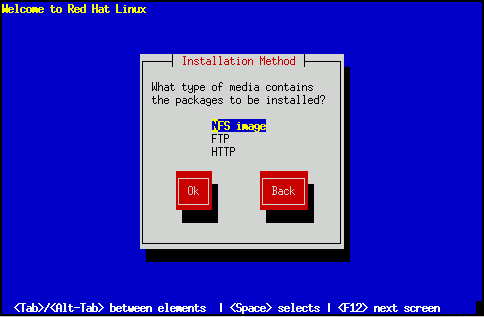
Now you must decide what type of installation method you wish to use (see Figure 33). Highlight the appropriate choice and select Ok, or press [Enter].
If you are not performing a network type installation (NFS, FTP, or HTTP) then please skip ahead to Chapter 6 to finish the installation process, or back to Chapter 4 if you need to perform a CD-ROM or hard drive installation.
If you are planning to do a network type installation, please read on.
Next, the installation program will probe your system and attempt to identify your network card. Most of the time, the driver can locate the card automatically. If it is not able to identify your network card, you'll be asked to choose the driver that supports your network card and to specify any options necessary for the driver to locate and recognize it.
After the installation program has configured your network card, it presents several dialogs for configuring your system's TCP/IP networking. The first screen (shown in Figure 34) allows you to select from one of three approaches to network configuration:

Please Note: The BOOTP and DHCP selections require an active, properly configured bootp (or dhcp) server running on your local area network.
If you choose BOOTP or DHCP, your network configuration will be set automatically, and you can skip the rest of this section.
If you've selected Static IP address, you'll need to specify all the networking information yourself. Figure 35 contains an example of networking information similar to what you'll be needing.
| Field | Example Value |
| IP Address | 10.0.2.15 |
| Netmask | 255.255.255.0 |
| Default Gateway | 10.0.2.254 |
| Primary Nameserver | 10.0.2.1 |
| Domain Name | redhat.com |
| Hostname | pooh.redhat.com |
Please Note: The information in figure 35 is a sample only! You should obtain the proper information for your network from your network administrator.
The first dialog asks you for IP and other network addresses (see Figure 36). Enter the IP address you are using during installation and press [Enter]. The installation program attempts to guess your Netmask based on your IP address; you may change the netmask if it is incorrect. Press [Enter]. The installation program guesses the Default gateway and Primary nameserver addresses from your IP address and netmask; you may change them if they are incorrect.
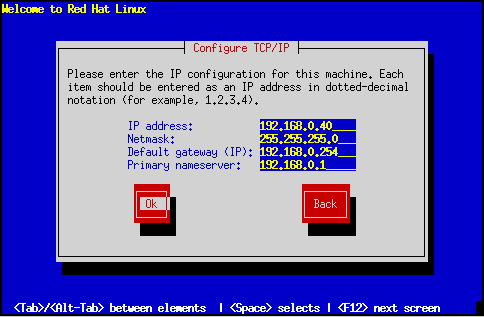
Choose Ok to continue.
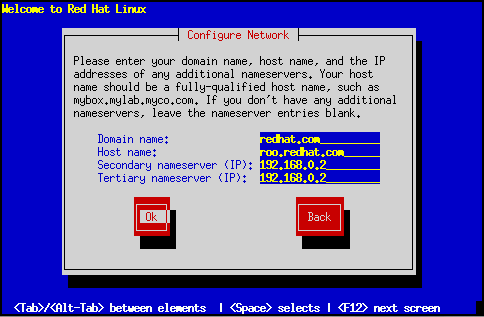
After the first dialog box, you may see a second one. It will prompt you for a domain name, a hostname, and other networking information (see Figure 37). Enter the Domain name for your system and press [Enter]; the installation program carries the domain name down to the Host name field. Enter the hostname you are using in front of the domain name to form a fully-qualified domain name (FQDN). If your network has more than one nameserver, you may enter IP addresses for additional nameservers in the Secondary nameserver and Tertiary nameserver fields. Choose Ok to continue.
Please Note: If you're performing an FTP installation, go to Section 5.3 and continue from there. If you're doing an NFS installation, read on.